Application & Nail Care
How to Make Press-On Nails Last Longer: 12 Tips for 1–2 Week Wear
Press-on nails can look fresh, glossy, and salon-like in minutes — but only if they stay on. If your press-ons pop off after one day, lift near the cuticle, or feel loose after washing your hands, the problem is usually not the nails themselves. Most early lifting comes from skipped prep, wrong sizing, trapped air, uneven glue, or too much water exposure right after application.
The good news is simple: with clean, dry nails, a proper fit, the right adhesive, and gentle aftercare, press-on nails can last much longer. This guide shows you how to make press-on nails last longer without overcomplicating the process or damaging your natural nails.
New to press-ons? Start with our complete guide to press-on nails for the full beginner overview, or read What Are Press-On Nails? if you want a quick explanation before applying your first set.
1. Quick Answer: How to Make Press-On Nails Last Longer
To make press-on nails last longer, start with completely clean, dry, oil-free natural nails. Gently push back your cuticles, lightly buff the nail surface, wipe each nail with alcohol or a nail prep pad, and choose press-ons that fit from sidewall to sidewall without touching the skin.
For longer wear, nail glue usually gives a stronger hold than adhesive tabs. Apply a thin, even layer of glue, place the press-on close to the cuticle at a slight angle, and press firmly for 20–30 seconds. Avoid water, lotion, cuticle oil, hot baths, swimming, and heavy chores for the first few hours after application.
The easiest formula to remember is:
Clean nails + correct sizing + even glue + firm pressure + gentle aftercare = longer-lasting press-on nails.
For a full application tutorial, read: How to Apply Press-On Nails
2. 12 Tips to Make Press-On Nails Last Longer
2.1. Start With Clean, Dry Nails
Press-on nails last longer when the adhesive bonds to your natural nail — not to oil, lotion, dust, old polish, or moisture. Before applying your set, wash your hands, dry them completely, and remove anything sitting on the nail plate.
Avoid applying press-ons right after a shower, bath, swim, or long hand soak. Natural nails can absorb water and temporarily soften. If you apply press-ons while your nails are still damp, the bond may weaken as your nails dry back down.
For best results, apply your nails after your skincare, shower, and chores are already done.
2.2. Remove Oils, Lotion, and Old Polish
Even if your nails look clean, they may still have natural oils or product residue on the surface. Nail glue and adhesive tabs do not grip well to oily nails.
Remove old polish or base coat first. Then avoid touching the nail plate with your fingertips, because skin oil can transfer back onto the nail. This small step can make a big difference if your press-ons usually pop off after one day.
2.3. Push Back Cuticles Gently
Cuticle tissue on the nail plate can stop a press-on from sitting flush. If the base of the press-on touches cuticle tissue or skin instead of the nail plate, lifting can happen much faster.
Use a cuticle pusher or orangewood stick to gently push back the cuticle area. Do not cut aggressively. The goal is to clear the nail plate, not irritate the skin.
This also helps the manicure look cleaner and more natural.
2.4. Lightly Buff the Nail Surface
Lightly buffing removes shine and gives the glue a better surface to grip. You do not need to file the nail harshly. A few gentle passes with a buffer are enough.
Avoid over-buffing, especially if your nails are already thin, weak, or peeling. Over-buffing can make your natural nails more fragile and may make future press-on applications less comfortable.
If you are worried about nail damage, read: Can Press-On Nails Damage Natural Nails?
2.5. Wipe Each Nail With Alcohol or a Prep Pad
After buffing, dust and oil can still sit on the nail plate. Wipe each nail with alcohol or a nail prep pad before applying glue or adhesive tabs.
This final cleaning step helps the adhesive bond to the nail surface instead of to leftover dust or residue. Let the nails dry fully before moving to the next step.
A simple prep order is:
Wash → dry → push cuticles → lightly buff → wipe with alcohol → size nails → apply.
2.6. Choose the Right Size and Curve
A press-on nail should cover your natural nail from sidewall to sidewall without overlapping the skin. If the press-on is too small, it can create tension and pop off. If it is too large, it may touch the skin and lift around the edges.
The curve matters too. A nail can look like the right width but still be too curved or too flat for your nail bed. Before adding glue, place each press-on on your natural nail and press lightly. It should sit comfortably without force.
For a deeper sizing guide, link to: How to Size Press-On Nails Correctly
2.7. File Press-Ons for a Better Fit
If a press-on is slightly too wide, do not force it onto the nail. Instead, gently file the sides until it fits your natural nail better.
A customized fit usually lasts longer than a nail that is too small or too wide. Take your time and lay out all ten nails in order before applying glue.
This also prevents one of the most common mistakes: applying glue first, then realizing the nail is the wrong size.
2.8. Use Nail Glue for Longer Wear
Adhesive tabs are useful for short-term wear, events, photos, or easy removal. But if your goal is longer wear, nail glue usually gives a stronger hold.
That does not mean you should use as much glue as possible. Too much glue can create a thick, uneven layer and spill onto the skin. Too little glue can leave dry spots and air pockets.
Use enough glue to cover the contact area in a thin, even layer.
For more detail, read: Best Nail Glue for Press-On Nails
2.9. Apply Glue Evenly
For a stronger bond, apply glue evenly to your natural nail and a small amount to the underside of the press-on. Avoid placing one large drop in the center and pressing down immediately.
A single thick drop may not spread evenly. It can also leave the edges dry, which makes lifting more likely.
The goal is full contact between the natural nail, glue, and press-on. Even glue coverage helps reduce air bubbles and weak spots.
2.10. Press Each Nail for 20–30 Seconds
Place the press-on close to the cuticle, but not on top of the skin. Apply it at a slight angle, starting near the cuticle and lowering it toward the tip. This helps push air out as the nail settles.
Once the nail is in place, press firmly for 20–30 seconds. Apply pressure to the center and sides so the glue bonds evenly.
Avoid wiggling, tapping, or adjusting the nail while the glue is setting. Movement can weaken the bond.
2.11. Avoid Water and Oil After Application
The first few hours after application are important. Water, steam, oil, lotion, and heat can weaken a fresh adhesive bond.
After applying press-ons, avoid long showers, hot baths, swimming, dishwashing, cuticle oil, and heavy hand cream near the glue line. You can still wash your hands when needed, but do not soak them.
For best results, apply press-ons at night after your shower and skincare routine. This gives the glue several dry hours to settle.
2.12. Protect Your Nails During Daily Wear
Even a perfect application can lift early if your nails are exposed to constant pressure. Use your finger pads instead of your nail tips when typing, opening containers, pressing buttons, or picking things up.
Wear gloves for dishes, cleaning, laundry, and chemical-heavy tasks. Keep the underside of the nails dry after washing your hands. If an edge becomes rough, file it gently before it catches on hair, fabric, or towels.
Short to medium press-ons usually last longer than very long styles because they snag less and put less pressure on the glue line.
3. What Makes Press-On Nails Fall Off Faster?
Press-on nails usually fall off faster when the adhesive bond is weakened. The most common causes are oil, moisture, poor sizing, air bubbles, uneven glue, water exposure, and too much pressure on the nail tips.
Common mistakes include applying press-ons over lotion, skipping the alcohol wipe, choosing nails that are too small, letting the press-on touch the skin, using too much or too little glue, pressing the nail flat all at once, and getting your hands wet too soon after application.
Long nails can also pop off faster if they catch on clothes, hair, bags, drawers, or keyboards. Every time the tip gets pulled, the pressure travels back to the glue line.
If your nails keep popping off even after careful prep, the issue may be your nail shape, adhesive type, or daily routine. For a deeper troubleshooting guide, read: Why Do My Press-On Nails Keep Falling Off?
4. Can Press-On Nails Really Last 2 Weeks?
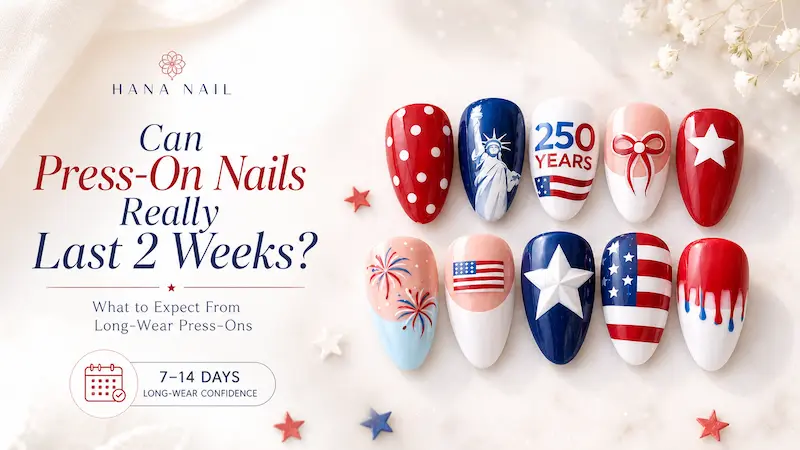
Yes, press-on nails can sometimes last up to two weeks, but it depends on your prep, fit, adhesive, nail shape, and lifestyle. A realistic long-wear goal for glue-on press-ons is often around one week, with some sets lasting closer to two weeks when everything is done well.
Press-ons are more likely to last longer when your nails are clean and dry, the press-ons fit your width and curve, you use nail glue, you avoid water and oil early, and you protect your nails during chores.
However, do not force a set to stay on just to reach two weeks. If the nails are lifting, uncomfortable, dirty underneath, or irritating your skin, remove them safely and start fresh.
For a full wear-time breakdown, read: How Long Do Press-On Nails Last?
5. How to Fix a Press-On Nail That Starts Lifting
A small lifted edge does not always mean the whole manicure is ruined. If the nail is still clean, dry, and comfortable, you can add a tiny amount of glue under the lifted area and press it firmly for 20–30 seconds.
Only re-glue if there is no pain, redness, itching, swelling, dirt, moisture, or unusual smell. Do not seal a dirty or wet lifted nail back down with more glue. Trapping moisture under a press-on can create an unhealthy environment for your natural nail.
If the nail popped off completely, clean both your natural nail and the press-on before reapplying. Do not simply glue over old glue, oil, or dust.
For more help, read: How to Fix a Press-On Nail That Falls Off
6. When to Remove Press-On Nails Instead of Re-Gluing
Making press-on nails last longer is helpful, but only when the manicure still feels secure and comfortable. Sometimes removal is the better choice.
Remove your press-ons instead of re-gluing if:
- A nail feels painful or tight.
- The skin around your nail is red, itchy, swollen, or irritated.
- The press-on has lifted enough for water or dirt to get underneath.
- Your natural nail looks discolored.
- There is an unusual smell.
- The set has been on too long and keeps lifting.
- The natural nail feels weak or damaged.
Never rip off glued press-ons. Pulling them off can peel layers from the natural nail and make future applications less comfortable.
For safe removal, read: How to Remove Press-On Nails Without Damage
You can also review our safety guide here: Are Press-On Nails Safe?
7. Best Press-On Nails for Longer Wear: What to Look For
Long-lasting press-on nails are not only about glue. The set itself matters too.
Look for press-ons that come in multiple sizes, match your natural nail curve, feel sturdy but not overly rigid, and suit your daily routine. Short to medium lengths usually last longer for everyday wear because they catch less and create less pressure on the glue line.
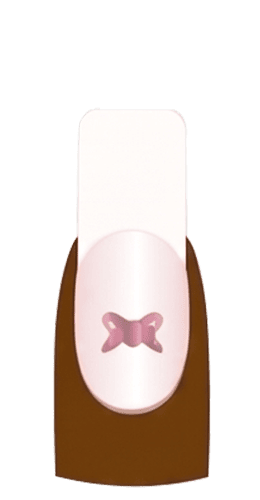
For daily use, oval, round, squoval, and short almond shapes are often easier to maintain than very long coffin, stiletto, or sharp square styles.
If you want a set that looks beautiful but is still wearable, choose a style that fits your lifestyle — not just the most dramatic design.
You can explore Hana Nail’s press-on collections here: Shop Press-On Nails
8. Final Long-Wear Checklist
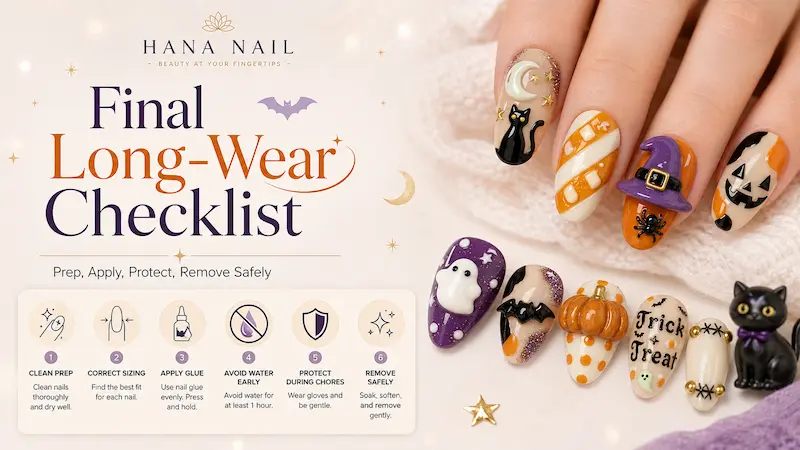
Use this checklist every time you apply a new set:
Before application:
- Wash and dry your hands.
- Remove polish, lotion, oil, and residue.
- Push back cuticles gently.
- Lightly buff the nail surface.
- Wipe each nail with alcohol or a prep pad.
- Choose the right size and curve.
- Lay out all ten nails before gluing.
During application:
- Use nail glue for longer wear.
- Apply glue in a thin, even layer.
- Place the press-on close to the cuticle, not on the skin.
- Apply at a slight angle to reduce air bubbles.
- Press firmly for 20–30 seconds.
After application:
- Avoid water and oil for the first few hours.
- Wear gloves for cleaning and dishes.
- Use finger pads instead of nail tips.
- File rough edges before they catch.
- Repair minor lifting only when the nail is clean and dry.
- Remove the set if there is pain, irritation, moisture, or major lifting.
9. FAQs About Making Press-On Nails Last Longer
How long can press-on nails last with nail glue?
Press-on nails applied with nail glue can often last several days to about one week. With excellent prep, correct sizing, careful application, and gentle daily habits, some sets can last closer to two weeks.
How do I make press-on nails last 2 weeks?
To make press-ons last closer to two weeks, start with clean, dry, oil-free nails. Lightly buff, wipe with alcohol, choose the right size and curve, use nail glue, press each nail for 20–30 seconds, and avoid water or oil soon after application.
Why do my press-on nails pop off after one day?
Press-ons often pop off after one day because of oil, moisture, wrong sizing, air bubbles, uneven glue, or water exposure too soon after application. Skipping prep is one of the most common causes.
Should I use nail glue or adhesive tabs for longer wear?
Nail glue is usually better for longer wear because it creates a stronger bond. Adhesive tabs are better for short-term wear, events, easier removal, or reusable press-on sets. Compare nail glue and adhesive tabs for press-on nails before changing the rest of your application routine.
Can I shower after applying press-on nails?
You can shower with press-on nails, but avoid showering immediately after application. Water, steam, and heat can weaken a fresh glue bond. For better wear, apply press-ons after your shower or wait several hours before exposing them to water.
Is it okay to re-glue a press-on nail that lifted?
It is okay to re-glue a lifted press-on only if the nail is clean, dry, and comfortable. Do not re-glue if moisture, dirt, pain, redness, swelling, or irritation is present.
Can making press-on nails last longer damage natural nails?
Making press-ons last longer does not have to damage your natural nails if you apply and remove them properly. Damage is more likely when nails are ripped off, over-buffed, glued onto irritated skin, or kept on after major lifting.
Final Thoughts
Press-on nails last longer when every step supports a clean, secure bond. You do not need complicated hacks — just proper prep, accurate sizing, even glue, firm pressure, and careful aftercare.
The goal is not to keep your nails on at all costs. The goal is to keep them looking beautiful while protecting your natural nails underneath.
For the best result, remember:
Prep carefully, apply patiently, protect daily, and remove safely when it is time.
Sources and Editorial References
This article was created by the Hana Nail editorial team using practical press-on nail care experience and publicly available guidance from trusted nail-care, dermatology, and cosmetic-safety sources.
References reviewed include:
- American Academy of Dermatology Association — artificial nail care and nail damage prevention
- U.S. Food & Drug Administration — nail care product and cosmetic safety information
- Cleveland Clinic — potential risks of press-on nails, including irritation, trapped moisture, and nail damage
- Clinical nail-health literature on artificial nails and nail-unit care
Editorial note: This article is for general nail-care education only. If you notice pain, redness, swelling, discoloration, unusual odor, or persistent nail changes, remove the press-ons and consult a licensed dermatologist or healthcare professional.