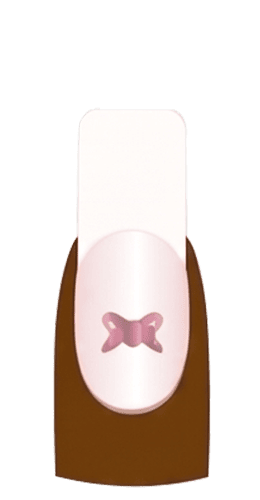
Application & Nail Care
How to Make Press-On Nails Look Natural: Fit, Placement, and Bulky-Nail Fixes
Press-on nails can look polished and seamless, but the result depends on more than choosing a subtle color. A set may look beautiful in the box and still appear wide, raised, crooked, or visibly separate from the natural nail once applied.
The most natural-looking result comes from matching each tip to the nail’s width, curvature, and cuticle profile, then applying it with a thin adhesive layer and precise placement. This guide focuses on the visual details that make press-ons look integrated rather than bulky. For a broader introduction to choosing, applying, wearing, and removing press-ons, visit our complete guide to press-on nails.
Quick answer: Press-on nails look most natural when each tip covers the nail from sidewall to sidewall, follows the natural curve, mirrors the cuticle line, and sits close to the nail plate without touching the skin. Color and length affect the style, but they cannot hide an oversized tip, incompatible curve, visible air pocket, or thick cuticle ridge.
1. Why Do Press-On Nails Look Fake or Bulky?
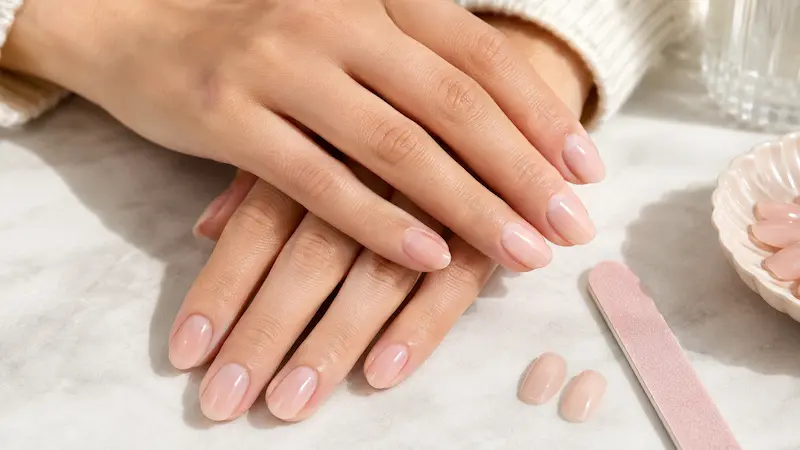
A press-on usually looks artificial because the tip does not fit the natural nail, the adhesive prevents even contact, or the nail was placed off-center. The location of the visible problem often reveals the cause.
| What you see | Likely cause | Best view to check | First action |
| Tip overlaps the skin | The tip is too wide or the base shape does not match | Top and front | Use a smaller tip or refine the sides before applying |
| Natural nail shows at the sides | The tip is too narrow | Top and front | Replace it with a wider tip |
| Center looks raised or hollow | The tip is more curved than the nail bed | Side | Try a flatter, compatible tip |
| Side edges rise during dry fitting | The tip is too flat for the nail bed | Front and side | Choose a tip with more curvature |
| Thick ridge near the cuticle | Excess glue, a thick tab, poor placement, or a thick base | Side | Reapply with less adhesive and improve base alignment |
| White or cloudy patch beneath the tip | Trapped air or uneven adhesive contact | Top and side | Reapply with even adhesive and a controlled rolling motion |
| One nail points sideways | The tip was placed off-center | Top | Remove and realign it with the finger |
| Natural free edge shows through | The natural nail is too long or the design is very sheer | Front and underside | Shorten the natural nail or choose greater opacity |
Do not judge the fit from a single close-up angle. A tip may look centered from above while showing a large air gap from the side. Checking the top, front, and side views before using adhesive is one of the simplest ways to avoid a false-looking result.
2. Check the Fit Before You Apply the Nails
Application technique cannot fully correct a tip that is fundamentally incompatible with the nail bed. Dry-fit every press-on first and evaluate three separate features: width, curvature, and cuticle profile.
2.1. Check Width and Sidewall Coverage
The tip should cover the visible nail plate from one sidewall to the other without resting on the surrounding skin. It is too large if it touches skin, looks wider than the fingertip, or must be forced down. It is too small if a strip of natural nail remains visible or the tip looks pinched and unstable.
Do not automatically size down to make the nail look slimmer. A narrow tip cannot be widened and often creates visible side gaps. When you fall between sizes, a slightly wider tip can usually be refined before application. For measuring methods, size charts, and advice for wide, flat, small, or petite nail beds, use our press-on nail sizing guide.
2.2. Check Curvature and the Side Profile
Width alone does not determine fit. Some nail plates are relatively flat, while others have a deeper C-curve. Press lightly at the center of the dry-fitted tip. If the sides lift, the tip may be too flat. If the center remains raised or the tip rocks, it may be too curved.
A compatible press-on should rest reasonably low without strong pressure. A gentle apex can add structure and strength, but an abrupt step at the base or a disproportionately high profile can make the nail look like a separate shell sitting on top of the finger.
2.3. Check the Cuticle Profile
Compare the base of the press-on with the visible line around the natural nail. A rounded, square, tapered, or slightly asymmetrical cuticle profile may require a different base shape. A mismatch can leave a visible gap in the center, create corners that approach the skin, or force the tip to sit too far forward.
Small differences can often be corrected before application, but stop if filing begins to distort the design or weaken a thin edge. Shape and length also influence the overall silhouette, though they cannot correct a poor fit. See our guide to press-on nail shapes and lengths for help matching the set to your hands and routine.
3. How to Apply Press-Ons for a Natural-Looking Finish
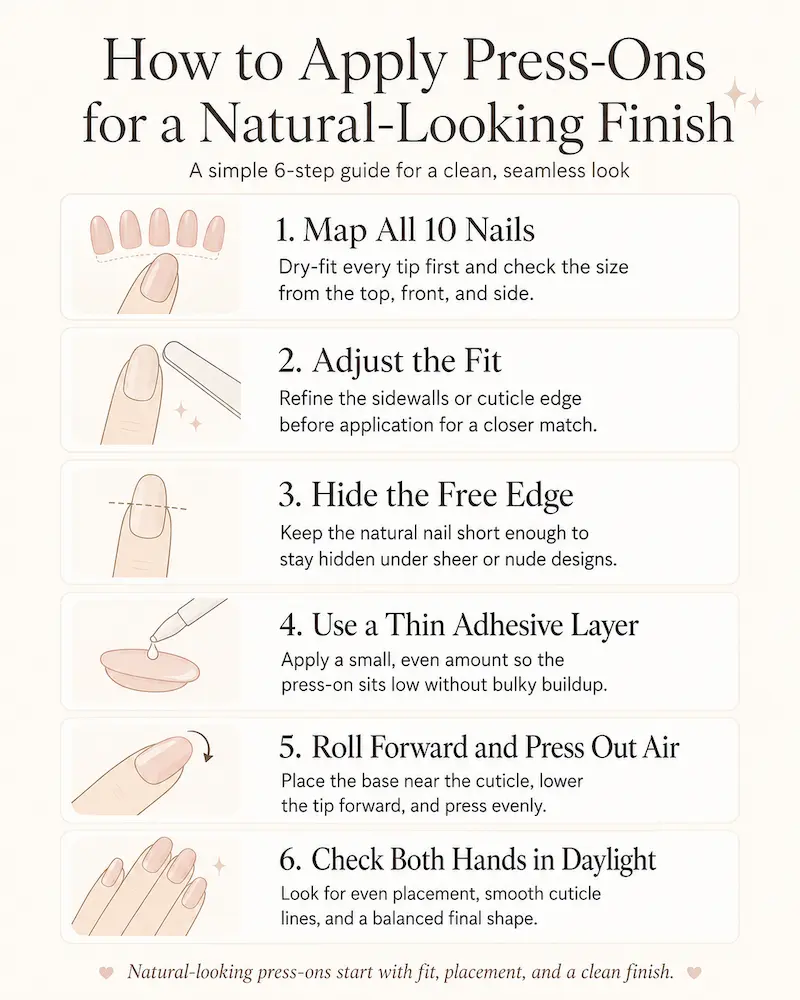
Once you have a compatible set, use these six appearance-focused steps. They do not replace the full application process; instead, they highlight the points that most affect visible fit, height, symmetry, and cuticle transition.
3.1. Map All 10 Nails Before Using Adhesive
Match every tip first and arrange the set in finger order. Corresponding fingers on the left and right hands do not always need the same size. Inspect each tip from above, from the front of the fingertip, and from the side. This prevents you from using the best-fitting tip on the wrong finger and helps reveal uneven width or curve before glue makes the decision permanent.
3.2. Make Small Fit Adjustments Before Application
Refine only the areas that prevent a clean fit, such as a sidewall that is slightly wide, a cuticle corner that approaches the skin, or a base that is marginally too square or rounded. Recheck the tip after every few file strokes.
Avoid aggressive filing while the press-on is attached, especially around the cuticle. Larger changes to length, shape, or sidewalls belong in a dedicated reshaping process. See how to cut, file, or reshape press-on nails before making substantial modifications.
3.3. Keep the Natural Free Edge Hidden Under Sheer Tips
Look beneath the tip during dry fitting. The natural nail should remain inside the press-on without extending past it or creating a visible shadow. This is especially important with glass, jelly, sheer nude, and French designs. If the free edge shows clearly, shorten and shape the natural nail before application or choose a more forgiving level of opacity.
3.4. Use a Thin Adhesive Layer and Align the Base
Start with a clean, dry nail plate and follow the preparation instructions supplied with the adhesive. Remove surface oil and dust, but do not cut living cuticle tissue to create space. Position the press-on close to the visible cuticle line while keeping it fully on the nail plate, not the skin.
Use enough adhesive to create even contact without flooding the sides. Excess glue can form a raised ridge, become visible beneath sheer artwork, and make precise placement harder. Adhesive tabs can also look natural, but an oversized, folded, or thick tab may make the tip sit higher. Neither method can correct the wrong width or curvature. For the complete preparation and attachment sequence, read how to apply press-on nails correctly; for a focused comparison, see nail glue vs. adhesive tabs.
3.5. Roll the Tip Forward and Press Out Air
Place the base close to the cuticle line at a slight angle, then lower the press-on gradually toward the free edge. This rolling motion helps move air forward instead of trapping it beneath the center. Once the tip meets the adhesive, avoid sliding it around. Keep the finger straight and use controlled pressure through the center and then toward the sides.
If glue escapes onto the skin, follow the adhesive manufacturer’s cleanup directions promptly. Do not conceal a visible gap or ridge by extending glue, gel, polish, or top coat onto the surrounding skin.
3.6. Compare Both Hands in Daylight
After application, look at the full set rather than evaluating only one macro photograph. Check consistent cuticle spacing, direction, sidewall coverage, matching lengths, visible adhesive, and unexpected height from the side. File only the free edge when the material and design allow it, and make corresponding adjustments evenly so the set remains balanced.
4. How to Hide Press-On Nail Edges Around the Cuticle
A visible edge is usually a fit or placement problem, not something that should be covered with more product. Identify what the edge looks like before choosing a fix.
4.1. A Visible Gap at the Base
A wide gap may mean the press-on was placed too far forward or its base cannot follow the cuticle profile. If the difference is obvious, remove the tip and correct the fit before reapplying. Painting over the gap rarely creates a clean transition and may place product on the skin.
4.2. A Raised Ridge at the Cuticle
Bulk concentrated at the base usually points to excess glue, a thick or folded tab, incorrect placement angle, or a thick cuticle edge. Bulk continuing through the full nail is more likely to come from the tip’s curvature, overall thickness, or size. Adding more adhesive will not flatten either problem.
4.3. A Side Corner Touching the Skin
This usually means the tip is too wide or the base shape does not match. Remove and refine or replace the tip. Do not leave a press-on pressing into the sidewall simply because it looks acceptable from above. Comfortable fit is part of a natural-looking result.
5. Sheer and Transparent Press-Ons Need Extra Care
Sheer, jelly, nude, and French designs reveal the natural free edge, uneven adhesive, trapped air, and gaps more easily than opaque artwork. Keep the natural nail short enough to remain hidden, spread the adhesive evenly, and inspect the tip in daylight before it fully sets. Semi-sheer coverage can be more forgiving than a completely transparent base.
Shade, undertone, opacity, and French-line proportions are separate design decisions. For those details, continue to our guides to nude press-on nails and French tip press-on nails.
6. How to Fix Press-Ons That Already Look Fake
Some problems can be improved while the nail is attached. Others require removal because the error is underneath the press-on or involves the fundamental fit.
| Problem | Can it be fixed while attached? | Best action |
| Tip overlaps skin | No | Remove it and use a smaller tip or refine the width before reapplying |
| Natural nail shows at the sides | No | Replace it with a wider tip; do not fill the gap with glue |
| Cuticle area looks bulky | Usually no | Reapply with less adhesive and check the base thickness and cuticle profile |
| Center looks raised or the tip rocks | No | Use a tip with a more compatible curve |
| One nail points sideways | No | Remove and realign it with the finger |
| Dry adhesive is visible | Sometimes | Use only the cleanup method recommended for that adhesive |
| Free edge is slightly too long | Sometimes | File the free edge evenly if the material and design allow it |
| Natural edge shows beneath a sheer tip | Usually no | Use a shorter natural nail or a more opaque tip next time |
Remove any tip that causes pressure, pinching, pain, or persistent contact with the skin. A press-on that must be forced into place is not a successful fit, even if it looks acceptable from one angle.
7. The Three-View Natural-Look Check
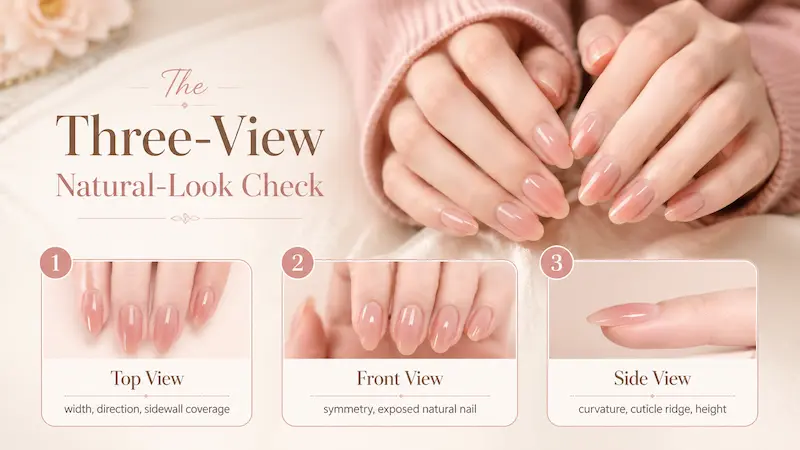
Use this quick framework before and after application:
- Top view: Check width, direction, cuticle spacing, and whether either sidewall is exposed.
- Front view: Check symmetry, visible natural nail, and whether the tip sits evenly across the fingertip.
- Side view: Check curvature, cuticle height, air gaps, adhesive thickness, and whether the nail appears to float.
A set does not need to imitate bare nails to look well applied. Bright colors, chrome, embellishments, and long shapes can still look intentional and polished when the transition between the natural nail, press-on, cuticle line, and fingertip is consistent.
Frequently Asked Questions
Can press-on nails really look natural?
Yes. Press-ons can create a clean, salon-like finish when the width, curvature, cuticle profile, adhesive contact, and placement work together. The design does not have to be nude or short; precise fit matters more than color.
Why do my press-on nails look bulky at the cuticle?
Common causes include excess adhesive, a thick or folded tab, a base that does not follow the cuticle shape, a tip placed too far forward, or an unusually thick cuticle edge. If the whole nail looks bulky, check the tip’s size and curvature.
How do I hide the edge of a press-on nail?
Refine the base before application and place it close to the cuticle without touching skin. A visible gap, raised ridge, or side corner usually needs refitting or reapplication. Extra glue or top coat around the skin is not a reliable fix.
Can already-applied press-ons be made to look less bulky?
Only minor free-edge adjustments and some adhesive cleanup can usually be done safely while the nail remains attached. Width errors, crooked placement, curve mismatches, and bulky adhesive underneath normally require removal and reapplication.
Final Thoughts
Making press-on nails look natural is not simply a matter of choosing a nude shade or short length. The most important details are width, curvature, cuticle fit, adhesive control, and alignment.
Dry-fit all 10 nails, evaluate them from three angles, and make small adjustments before using adhesive. When a tip cannot sit comfortably and evenly, replace it rather than forcing it into place. A carefully fitted manicure can still be colorful, detailed, or dramatic while looking clean and professionally applied.
Sources and Editorial References
- American Academy of Dermatology Association – Artificial nails: Dermatologists’ tips for reducing nail damage
- U.S. Food and Drug Administration – Nail Care Products
- InStyle – Press-on nail product testing and nail-artist guidance on fit and curvature
Editorial disclosure: Hana Nail designs and sells handmade press-on nails. This guide focuses on practical fit and application principles and does not present Hana Nail as an independent reviewer of its own products.